NOTE: due to the depth of options for Connection Card management, we highly recommend watching our tutorial video above.
Connection Cards vs Profile Information
A Connection Card is a form that is meant to be filled out regularly. It may contain questions such as responses (wanting to know more about Christ, wanting to be baptized, etc) or temporary polls such as a poll on the best date for an upcoming event.
Profile Information is information that would typically be asked for on a paper connection card, such as name, address, children info, etc., but is only required once. Because My Sermon Notes is a digital platform, this information can be securely saved and there is no need to ask members for this same information week after week.
Creating Connection Cards
To create a connection card, click "Connect > Connection Card Builder" on the main menu of the admin portal. The connection card builder uses a drag-and-drop interface, and elements may be clicked from the left sidebar to add it to the bottom of the form, or you may drag the element from the sidebar to the appropriate spot on the form.
Configuring Elements
Elements can be configured by clicking text and modifying what the element says. In this example, we will use the "Radio" element. To change the title of the radio question, click the bold text at the top and change it. Follow the same process to change the text next to each radio button.
Adding text within a radio button question
If you would like to add text to break up radio button options, you may click the ![]() icon. This will add another line of text that you can organize by clicking and dragging the
icon. This will add another line of text that you can organize by clicking and dragging the  icon.
icon.
Indenting Elements
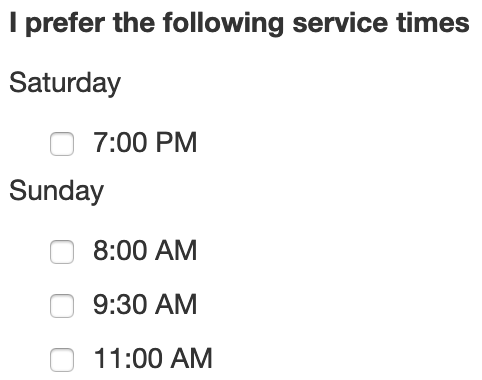
To indent a specific radio box for organization sake, click the ![]() icon. You can click the reverse icon
icon. You can click the reverse icon ![]() to dedent items. You can use this feature combined with the additional text box to add questions within a question (see screenshot for example).
to dedent items. You can use this feature combined with the additional text box to add questions within a question (see screenshot for example).

Adding text boxes next to elements
To add text boxes next to radio buttons or check boxes, click the  icon. This will create a blank text box for respondents to type feedback and will display in the app as seen in the screenshot below.

Adding additional radio boxes and check boxes
To add additional radio boxes and check boxes to forms, click the radio button or check box icon to the right of the element title.
Organizing elements
To organize elements and organize items within an element, click and drag the icon.
icon.
Connection Card responses
View Connection Card responses at Connect > Connection Card Responses. Responses are shown in the form of "action items." Responses are grouped by answer. To mark an item as resolved, check the box and click "Mark Completed"
Connection Card notifications
To receive a daily summary of new Connection Card submissions, go to Connect > Connection Card Notifications and add any staff members who would like a daily briefing.
Creating "Profile Information" questions
To access the dedicated Profile Information form editor, go to Connect > Profile Information. The editor is identical to the Connection Card form builder.